Zphisher graphic extension
DISCLAIMER
This toolkit contains materials that can be potentially damaging or dangerous for social media. Refer to the laws in your province/country before accessing, using,or in any other way utilizing this in a wrong way.
This Tool is made for educational purposes only. Do not attempt to violate the law with anything contained here. If this is your intention, then Get the hell out of here!
It only demonstrates "how phishing works". You shall not misuse the information to gain unauthorized access to someones social media. However you may try out this at your own risk.
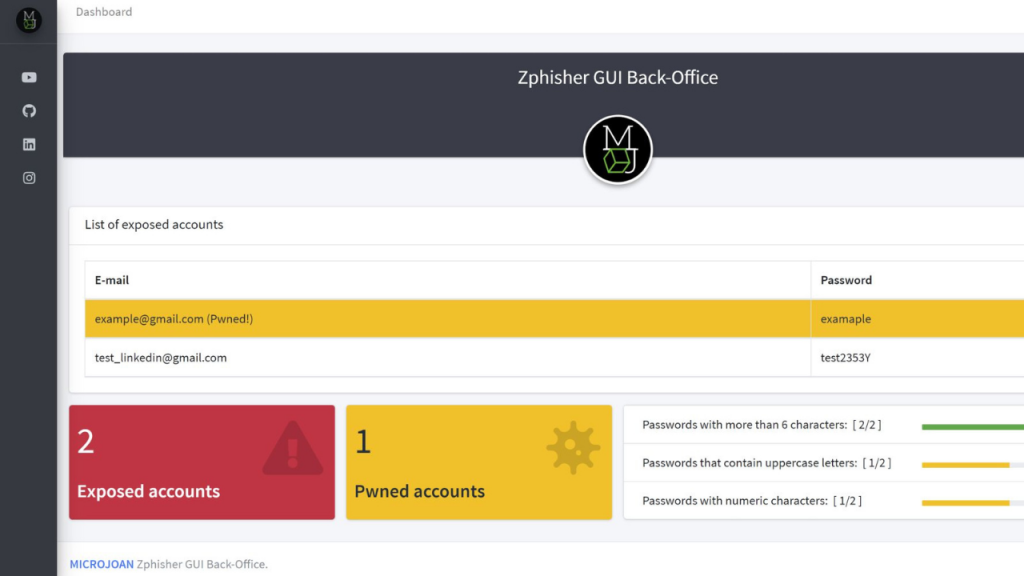
Zphisher-GUI-Back_office
This is a plugin where you can see in real time the victims of your phishing campaign, you just have to change the Zphisher files for these. Easy!
This tool creates a graphical back office for the zphish tool (although it is not 100% necessary to use this tool, you can use these files by hosting it on a localhost).
If you don't have Zphisher installed on your computer: https://github.com/htr-tech/zphisher
Video
Instructions
- You need to deploy the server with a template, identify in the "login.html" file the name of the two post parameters.
- Modify the post parameters of the "login.php" file of the plugin with the original identifier of Zphisher (line 7 and 8).
- Replace all deployed http server files with plugin files (except login.html).
- Set "chmod 777 -R in parental directory of phishing".
If you have an api key from haveibeenpwned.com you have to insert it in the file "api_key.txt" in the directory "programa interprete", in this way the back-office will tell you which accounts are exposed on the internet.
No need 100% Zphisher
You can also use this plugin by hard sharing the project by Ngrok from your LocalHost without using Zphisher.
This plugin comes with a sample login page, in this case from Office 365, you can use any Zphisher template for this plugin, using Ngrok to share your localhost.
Where are the results saved?
The results will be saved in /programa_interprete/user_data.csv

Back office properties
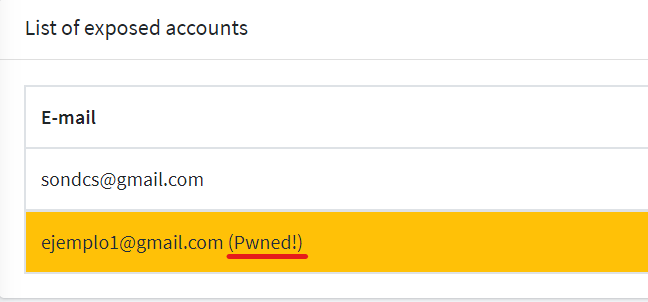
-You can see if the inserted account is exposed on the internet:
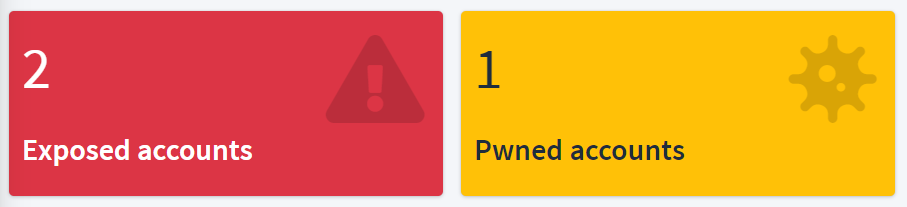
-Total number of accounts and "Pwned" accounts:
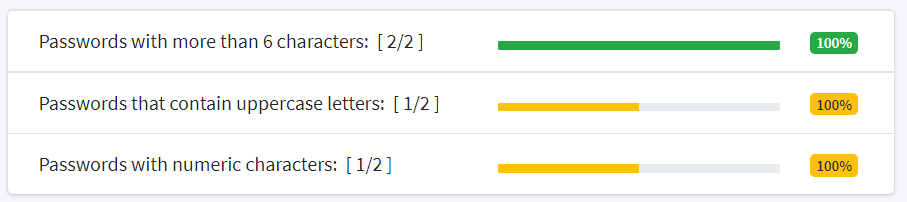
-Evaluation of security in the passwords of all the inserted accounts: